

Assemble a temporary kitchen in a weekend: setups homeowners can build

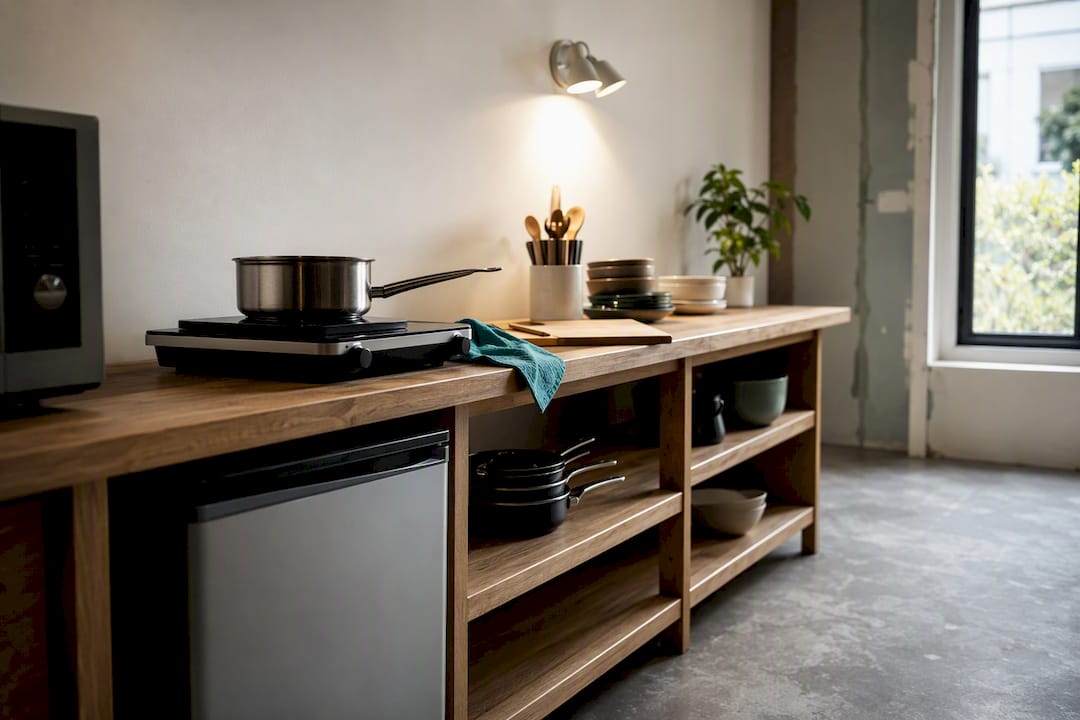
A workable temporary kitchen during renovation comes down to three things: reliable cold storage, a heating method that doesn’t rely on your gutted kitchen, and somewhere to wash up. Pick a room away from the work zone and set these up before demolition starts, not after. Move the fridge, test the power points, and you’re most of the way there.
TL;DR:
Ensure your temporary kitchen is set up in a room with a shutable door, hard flooring, and minimal dust infiltration before demolition begins.
Focus on essential appliances: a fridge or cooler, an induction hotplate or convection oven, and a basin for washing, with optional extras like a microwave or slow cooker.
Plan meals around simple, batch-cooked recipes, relying on one-pot dishes and freezing portions to manage with limited equipment and time.
Maintain hygiene by sealing food, covering dishes, washing immediately after use, and wiping surfaces daily to prevent dust buildup.
Coordinate with professionals to test circuits beforehand, plan around renovation phases, and keep the setup minimal and organized to reduce disruption.
Table of Contents
How do you choose the best location for a temporary kitchen?
What appliances do you actually need for a temporary kitchen?
How do you keep a temporary kitchen clean and hygienic during construction?
How long will you need a temporary kitchen, and what should you budget?
How does Sorted Home Solutions reduce the temporary-kitchen phase?
How Sorted Home Solutions can manage your renovation and temporary kitchen phase
How do you choose the best location for a temporary kitchen?
The room matters more than the appliances. A good spot for a temporary cooking space sits far enough from the work zone that dust doesn’t drift in every time a door opens, has a door you can actually close, and gives you a hard floor rather than carpet that will soak up spills and grime.
Laundries are often the unsung hero here. They usually have a tub, which solves your washing-up problem instantly, and enough electrical capacity for a hotplate or microwave. The catch: if a laundry circuit already runs your dryer, don’t run a heavy cooking appliance on it at the same time. Get an electrician to check the load before you commit, not after you’ve tripped the switchboard mid dinner.
Dining rooms and garages are the other common picks. A dining room keeps you close to the rest of the house and usually has enough power points, but you’ll need to protect the floor and furniture from splashes. A garage gives you space and separation from dust, but ventilation and lighting are often poor, and it can get uncomfortably cold or hot depending on the season. Basements share the garage’s separation advantage, with the same ventilation caveat.
Before demolition day, run through this:
Count your power points and check they’re on a circuit that isn’t also carrying trade tools
Confirm water access, even if it’s just a laundry tub or an outdoor tap with a hose
Lay down floor protection and mark a clear path so contractors aren’t walking through your cooking zone
Check the room has a door or barrier you can shut against dust
Pro Tip: Ask your electrician to test the exact circuit you plan to use, not just confirm the room has power. A point that’s fine for a lamp can trip under an induction hotplate and a kettle running together.
What appliances do you actually need for a temporary kitchen?
You don’t need a full kitchen’s worth of gear. You need the right three or four pieces, chosen for what they replace.
The core three: a bar fridge or a large cooler for cold storage, an induction hotplate or countertop convection oven for heating, and a tub or large basin for washing up if your room doesn’t have a sink. Portable appliances such as induction hotplates, countertop convection ovens and slow cookers cover the bulk of everyday cooking, and induction hobs carry a lower fire risk than old-style coil elements, which matters when you’re cooking in a room that was never designed for it.
Beyond that, a few extras earn their space fast:
Microwave, for reheating and speed
Slow cooker or multi-cooker, for set-and-forget dinners
Kettle and toaster, for the basics you’ll use daily
Portable drying rack, since your dishwasher is out of action
Bunnings NZ’s advice for a minimal setup is worth following almost exactly: a small table, a kettle, a toaster or sandwich press, a microwave, a laundry or bathroom sink for washing, and a bar fridge or esky for anything that needs to stay cold.
On power: check your circuits first, avoid daisy-chaining extension cords between multiple heat-producing appliances, and use a surge-protected board rather than a bare double adaptor. Renting a bar fridge or hotplate for a few weeks is usually cheaper than buying, especially if you already own a slow cooker or microwave that’s been sitting in the garage.
How do you plan meals with a limited temporary kitchen?

Meal planning during a renovation isn’t about cooking less. It’s about cooking simpler. Simple, pre-prepped meals and a higher reliance on takeaways are standard advice for the first few weeks, while you find your rhythm with one hotplate and a slow cooker.
A practical approach:
Plan meals a week at a time rather than day by day, so your shopping list matches what your temporary setup can actually cook.
Lean on one-pot dishes and sheet-pan dinners that need a single appliance and minimal cleanup.
Batch cook on weekends when you have more patience, then freeze portions for the busy weeknights.
Store everything in sealed containers, both to protect food from dust and to keep your bar fridge organised.
Rotate perishables to the front and accept that some nights will end in takeaway. Budget for it rather than fighting it.
A sample seven-day outline: slow-cooker casserole, sheet-pan chicken and vegies, pasta with a jarred sauce, leftovers night, one takeaway night, a simple stir-fry on the hotplate, and a second slow-cooker meal to close the week. Adjust for your household, but keep the shape: two set-and-forget meals, two quick ones, one leftovers night, one takeaway.
How do you keep a temporary kitchen clean and hygienic during construction?
Dust is the real enemy here, not the lack of a full kitchen. Sealing off the work zone and storing food in sealed containers does more for your sanity than any appliance upgrade.
Set up a physical barrier between the work zone and your temporary kitchen, even if it’s just a closed door and a taped seam. Agree on a contractor path that doesn’t cut through your cooking area, and keep the temporary kitchen door shut whenever trades are active.
Daily habits matter more than a big weekly blitz, though both help:
Keep food covered at all times, even between meals
Wash dishes straight after use rather than letting them sit exposed to dust
Dry dishes on a rack with a tray underneath to protect the bench
Store dry goods in sealed tubs, not open shelves
Run a fan with a filter if the room allows it, and keep food preparation away from any doorway that opens onto the work zone. Check smoke alarms are still active in your temporary kitchen, keep heating appliances clear of anything flammable, and never leave a hotplate unattended while dust sheets or drop cloths are nearby.
Pro Tip: Do a proper wipe-down of every surface at the end of each work day, not just at the end of the week. Fine renovation dust settles fast and gets ground into benchtops if it’s left overnight.

How long will you need a temporary kitchen, and what should you budget?
Most kitchen renovations run several weeks, typically from a few to several months depending on scope, and that range should shape how much you invest in your temporary setup. A three-week reno might not justify buying a bar fridge; a ten-week job probably does.
Budget lines to plan for:
Appliance purchase or rental (hotplate, bar fridge, microwave)
Extra food costs, including a realistic takeaway allowance
A contingency line, with industry guidance suggesting 10–15% of your renovation budget set aside for the unexpected, including temporary living costs
Some phases are disruptive enough to justify staying elsewhere for a few nights, particularly demolition, any hazardous material removal, and floor finishing where fumes or dust are heaviest. Ask your contractor for milestone dates upfront so you know exactly which weeks will be worst, and plan your temporary kitchen around those windows rather than guessing.
What’s the 7-day setup checklist before demolition starts?
Treat the week before demolition as its own small project. Packing non-essentials away early and keeping only what you’ll actually use stops the chaos before it starts.
Pack away anything you won’t use daily, keeping just two pots, basic cutlery, a handful of plates and cups, and essential tools within reach.
Move the fridge to its temporary spot and test that the circuit handles it without tripping.
Set up your wash station, whether that’s a laundry tub or a large basin with a drying rack alongside.
Confirm power points, run a surge-protected board, and lay floor protection under any heat-producing appliance.
Label boxes by which cabinet or drawer they’ll return to, so moving back in is a straight swap, not a second renovation.
Brief your contractor on the paths you need kept clear and confirm any water or power shutdown windows in advance.
Pro Tip: Ask for shutdown windows in writing, even just a text message. Knowing exactly when water or power will be off for a few hours means you can cook and wash up around it instead of discovering it mid meal.
How does Sorted Home Solutions reduce the temporary-kitchen phase?
A managed renovation shortens the painful part more than any appliance choice does. Sortedhomesolutions runs on a single-point model, coordinating every trade so demolition, plumbing and electrical rough-in happen in a tight, planned sequence rather than dragging out over separate visits. Scheduling the highest-impact messy phases together means your temporary kitchen only has to carry the load for the shortest stretch possible, not weeks longer than necessary.
Before work starts, it’s worth checking a few things with whoever’s managing your project: which week demolition happens, when utilities get disconnected and reconnected, and how floor finishing lines up with the rest of the schedule. Sortedhomesolutions’s kitchen renovation timeline guide walks through what to expect phase by phase, and the work triangle layout guide explains why certain zones get prioritised early, which is exactly the same logic that should shape your temporary setup.
What I’d tell a mate about living through a kitchen reno
Most homeowners can stay in the house through a kitchen renovation with a bit of planning. It’s the households that treat the temporary kitchen as an afterthought, thrown together the night before demolition, who end up eating standing at the bench for six weeks.
The one tip that gets skipped most often: get an electrician to test your intended circuits before demolition day, not during it. A laundry tub and a hotplate solve most problems, but only if the power behind them can actually handle a kettle and a hotplate running at once. Schedule demolition, if you can influence it, for a week where you can afford a few takeaway nights without it wrecking the budget.
— Rudi
How Sorted Home Solutions can manage your renovation and temporary kitchen phase
There are ways to muddle through a renovation solo, coordinating your own trades and guessing at timelines as you go. Sortedhomesolutions offers a different route: one point of contact managing every trade, so you get a clear sequence of dates instead of a shifting guess about when demolition starts and when your temporary kitchen phase actually ends.

The full home renovation service covers kitchens, plumbing, electrical and everything in between under one contract, which means the messy phases get scheduled together rather than spread across months. Check the kitchen and bathroom pricing guide for a sense of cost, browse the kitchen renovations gallery for finished examples, and get in touch through the inquiry page to request a timeline check, so you know exactly how many weeks your temporary kitchen actually needs to last.
Sources
For containment and low-dust work practices, One Day Doors & Closets’ guide to minimising renovation disruption is a useful companion read. For real-world photos of a working temporary setup, The Gold Hive’s temporary kitchen tour is worth a look, alongside Sortedhomesolutions’s own renovation project management guide.
Recommended
Comments