

Avoid Costly Rework: NZ Kitchen Appliance Planning, G3 & Specs


Before you order anything: measure your space, list every appliance model and lock in your services early. This single sequence prevents the costly rework that hits most kitchen renovations. Check your plan against NZ Building Code clause G3 for sink and storage minimums, and bring in a licensed trade before rough-in if you’re unsure. The checklist below walks you through every step.
TL;DR:
Precise appliance measurements are crucial, especially for integrated models, to prevent costly mismatches between cabinetry and actual appliances.
The NZ Building Code specifies minimum sink containment of 300 mm by 125 mm and requires adequate storage and clearance for hygiene and safety.
Effective kitchen layout depends on proper circulation space, with minimum aisle widths of 900 mm for one cook and 1200 mm for two, plus proper placement of zones.
Final rough-in positions for appliances and services must be verified with model-specific dimensions to avoid expensive rework after installation.
Choosing appliances with higher energy star ratings can significantly reduce long-term power costs, especially for continuous-use items like fridges.
Table of Contents
What is the kitchen appliance planning checklist from brief to installation?
What clearances and Building Code rules apply to kitchen appliances?
How should you plan layout and circulation for your kitchen?
What rough-in heights and timing pitfalls should you check before installation?
What energy efficiency ratings should guide your appliance choices?
How do you match appliance size and capacity to household needs?
How do you future-proof your kitchen for later appliance upgrades?
What is the kitchen appliance planning checklist from brief to installation?
Good kitchen appliance planning follows a fixed order, and skipping steps is where most budgets blow out. Miss the sequence and you’ll be cutting cabinetry on site or waiting six weeks for a replacement panel while your kitchen sits unusable.
Start with a written brief, not a Pinterest board. Cover how many people cook at once, whether anyone needs accessible bench heights or seated workspace, and what gets stored where. A household of five with a teenager who bakes needs a different fridge and oven combination than a couple who cooks twice a week.
The planning sequence, step by step:
Write the brief: cooking habits, number of cooks, storage priorities, accessibility needs.
Measure the room and record every fixed service: plumbing points, drainage, gas lines, extraction ducting, power circuits.
Produce a scaled floor plan or clearly annotated photos with dimensions marked at each wall.
Build an appliance list with exact model numbers, not just categories, before cabinetry manufacture begins.
Get design sign-off from everyone living in the house, not just whoever is running the project.
Confirm rough-in positions match the chosen models.
Check the cabinet carcasses against the actual appliance dimensions before benchtop templating.
Template the benchtop only once appliances are confirmed and cavities are checked.
Schedule appliance delivery and installation to match the trade sequence, not the other way around.
That fourth step trips up more renovations than any other. Cabinetmakers build to exact cavity dimensions, and a fridge that’s 5 mm taller than the display model you measured will not fit once the carcass is built.
Budget and timing checkpoints to build into your plan:
Set aside contingency for integrated panel appliances, which typically run longer lead times than freestanding units.
Confirm custom benchtop fabrication timelines before you commit to a fit-off date.
Check specialist appliances (induction cooktops, integrated coffee machines, wine fridges) for stock availability, since these often ship from overseas.
Get written sign-off at each milestone so nobody assumes a decision was final when it wasn’t.
Industry planning guidance from major appliance brands follows a near-identical sequence: gather ideas, define your needs, measure carefully, then select appliances before finalising cabinetry. That order exists because reversing any two steps almost always costs money.
Pro Tip: Photograph your model numbers and stick them inside the kitchen file you hand to every trade on site. A tiler or electrician working from memory of “the silver oven” is how mismatched rough-ins happen.
For a realistic sense of how long each stage takes once trades are booked, it’s worth reading up on kitchen renovation timelines before you set a move-back-in date.
What clearances and Building Code rules apply to kitchen appliances?
New Zealand’s Building Code sets hard minimums for kitchen sinks, storage and clearances, and your plans need to meet them before consent is even a question. Clause G3 requires food preparation areas to meet hygienic performance standards, and the sink is the specific point most homeowners get wrong.
Under NZ Building Code Clause G3, a kitchen sink must fully contain a solid cylinder 300 mm in diameter and 125 mm deep. That’s not a suggestion. A shallow trough-style sink that looks striking in a display kitchen can fail this test outright, forcing a swap after installation.
Key G3 and clearance figures to check against your plan:
Perishable food storage must provide at least 0.5 cubic metres for up to two people, rising to 1.0 cubic metre for three to five people, plus 0.2 cubic metres per extra person.
Minimum clear operational space on the working side of a bench should sit at 800 mm or more.
Where the kitchen needs to accommodate people with disabilities, benches sit at a maximum of 900 mm above finished floor level, with a 1500 mm turning circle nearby.
Rangehood height above the cooktop, oven door swing clearance, and fridge door swing all need checking against the specific model, not a generic spec.
Sinks that look right in a showroom regularly fail the 300 mm × 125 mm containment test once measured properly. It’s a five-minute check that saves a full sink replacement later.
Manufacturer planning guides matter here just as much as the code. A Fisher & Paykel integrated refrigeration planning guide lists exact cavity heights, panel dimensions, toe-kick allowances and hinge articulation space. A generic cabinetry cutout will not necessarily suit every brand, and integrated appliances are the least forgiving of a guessed dimension. If your renovation touches drainage, ventilation ducting through a wall, or any structural change, get a licensed trade or building consent authority involved before cabinetry is ordered, not after.
If you’re choosing splashback and wall lining materials around the sink and cooktop, hygienic, easy-clean surfaces matter for G3 compliance too. There’s more on splashback options that suit NZ kitchens worth checking before you finalise finishes.
How should you plan layout and circulation for your kitchen?
Layout decisions determine whether your kitchen works for one cook or falls apart the moment a second person tries to help. The classic work triangle, connecting fridge, sink and cooktop, still holds up in enclosed kitchens, with a recommended total distance of roughly 3.7 to 7 metres between the three points. Go shorter and you’re constantly bumping into cabinetry. Go longer and you’re walking laps to plate up dinner.
Open-plan kitchens complicate the triangle model, since there’s often a fourth or fifth zone (a breakfast bar, a butler’s pantry, a coffee station) pulling traffic in different directions. In those layouts, think in zones instead: a wet zone around the sink and dishwasher, a cooking zone around the cooktop and oven, and a cold storage zone around the fridge, each with its own clear approach path.
Aisle and clearance rules worth building into your plan:
Minimum aisle width for a single-cook kitchen sits at 900 mm.
Two people working side by side comfortably need closer to 1200 mm.
Islands need clear circulation space on every side, not just the side facing the dining area.
Leave a landing space of at least 300–400 mm beside major appliances (fridge, oven, cooktop) so hot dishes and grocery bags have somewhere to go.
Islands look fantastic in renders but create pinch points when the aisle either side drops below that 900 mm minimum, particularly once you add stools or a bin drawer that swings out further than expected. If you’re weighing up an island against a peninsula, there’s a detailed breakdown of the trade-offs between island and peninsula layouts that covers seating, service runs and appliance access. For readers working with a genuinely tight footprint, this practical guide to efficient kitchen layouts covers some layout options beyond the standard L-shape and galley formats.
What rough-in heights and timing pitfalls should you check before installation?
Finalising exact appliance models before rough-in isn’t optional if you want to avoid remedial plumbing and electrical work later. Trades often set services to generic heights when a spec sheet isn’t provided, which is one of the most common causes of post-installation rework.
Typical NZ rough-in positions to confirm with your plumber and electrician include:
Sink mixer at approximately 1050 mm above finished floor level (AFFL), with sink waste around 350 mm AFFL.
Power outlets are commonly set 200 to 250 mm above benchtop level, approximately 1100 to 1150 mm above finished floor level.
Dishwasher water supply and waste connections are typically positioned near 350 mm and 500 mm above finished floor level respectively.
Fridge water tap position confirmed against the specific integrated model, since cavity depth varies between brands.
Extraction ducting is worth locking in early too. Ducted rangehoods need a clear run to an external wall or roof, and recirculating options change your cabinetry cutout entirely. Confirm ducting diameter and electrical load with the manufacturer’s spec sheet before the electrician pulls cable.
Pro Tip: Ask your installer to physically hold the appliance spec sheet against the cabinet cavity before plaster goes up. It takes ten minutes and it’s the single cheapest insurance policy in the entire renovation.
Get your cabinetmaker, plumber and electrician to sign off on the final cavity dimensions together, ideally in person, before benchtop templating locks everything in place.
What energy efficiency ratings should guide your appliance choices?
Energy ratings deserve a place on your appliance list next to the model number, not as an afterthought once the kitchen’s built. New Zealand appliances carry an Energy Rating Label showing stars, and more stars means lower running costs over the appliance’s life, even when the sticker price is higher upfront.
Fridges and freezers run continuously, so their star rating has the biggest long-term impact on your power bill of any kitchen appliance. A four-star fridge against a two-star model of similar capacity can add up to a meaningful difference in running costs over a decade, even though the two appliances might look identical in a showroom.
Dishwashers and ovens carry ratings too, though their impact is smaller simply because they run for shorter periods. Induction cooktops use less energy than ceramic or gas cooktops for equivalent cooking tasks, largely because they heat the pan directly rather than heating a element or flame first.
When you’re comparing two appliance models with similar features, check the star rating alongside capacity and dimensions on your planning list. It’s a five-second comparison that pays off every power bill for the life of the appliance, and it’s exactly the kind of detail that gets skipped when appliance selection happens in a showroom under time pressure rather than against a written brief.
How do smart kitchen appliances fit into your planning?
Smart kitchen technology adds a layer to your planning that didn’t exist a decade ago: network compatibility. Wi-Fi-connected ovens, fridges with internal cameras, and app-controlled dishwashers all need a reliable home network signal reaching the kitchen, which isn’t automatic in every renovation.
Check three things before committing to a smart appliance. First, whether your home Wi-Fi reaches the kitchen reliably, particularly if the appliance sits inside a cabinet cavity that can weaken signal strength. Second, whether the appliance’s smart features need a specific app ecosystem, since a smart fridge and a smart oven from different manufacturers won’t necessarily talk to each other. Third, whether the smart features actually matter to how your household cooks, rather than being a box ticked because it sounded appealing in the showroom.
None of this changes the physical rough-in requirements. A smart oven still needs the same clearances, power supply and cavity dimensions as a standard model, plus a stable power connection for its control board. Where smart technology genuinely helps is remote monitoring: getting an alert if the fridge door’s been left open, or checking the oven’s progress from another room. It’s a genuine convenience for busy households, but it’s not worth compromising a better-performing appliance just to chase connected features.
How do you match appliance size and capacity to household needs?
Appliance capacity should match how your household actually lives, not how many people technically live under the roof. A couple who entertains most weekends needs a larger oven and fridge than a family of four who eats out twice a week, regardless of headcount.
Fridge capacity is the easiest to get wrong because showroom models look deceptively spacious next to a kitchen display. Under the Acceptable Solution G3/AS1, minimum perishable storage sits at 0.5 cubic metres for up to two people and 1.0 cubic metre for three to five, and that’s a legal floor, not a comfortable target for most households doing a weekly shop.
Oven capacity matters most for households that cook for extended family or entertain regularly. A single 60 cm oven cavity struggles when you’re roasting a full dinner plus sides for eight people, which is when a second oven or a wider 90 cm range earns its cabinetry space. Dishwasher capacity should match how often you cook from scratch rather than reheat, since a household running two cooked meals a day fills a standard dishwasher faster than most people expect.
The mistake to avoid is buying to fit the cabinetry rather than buying to fit the household, then discovering the appliance is too small within twelve months.
How do you future-proof your kitchen for later appliance upgrades?
Future-proofing your kitchen appliance planning means designing cavities and services with a bit of flexibility, not locking every dimension to today’s exact model. Appliance ranges change every few years, and a cabinet built to the millimetre for a discontinued model can be genuinely difficult to retrofit five years later.
Where it’s practical, build a small margin into integrated appliance cavities rather than cutting to the exact current model’s dimensions. A few millimetres of clearance around a dishwasher or fridge cavity gives you room to swap brands later without rebuilding cabinetry. Power and plumbing rough-ins are worth over-specifying slightly too. An extra power circuit near the bench costs little to install during a renovation and saves an expensive retrofit if you add a coffee machine or a second oven down the track.
Consider which appliances you’re likely to upgrade first. Ovens and cooktops tend to last 10 to 15 years, while smaller appliances like microwaves or coffee machines get replaced more often. If a benchtop appliance is likely to change, avoid building permanent joinery around it that only suits one exact model.
Accessibility is part of future-proofing too, and it’s a low-cost addition at the design stage rather than an expensive retrofit later. Lever taps, a lower bench section, and clear floor space for a 1500 mm turning circle cost very little to include now and matter enormously if mobility needs change for anyone in the household later on.
What safety considerations matter for appliance placement?
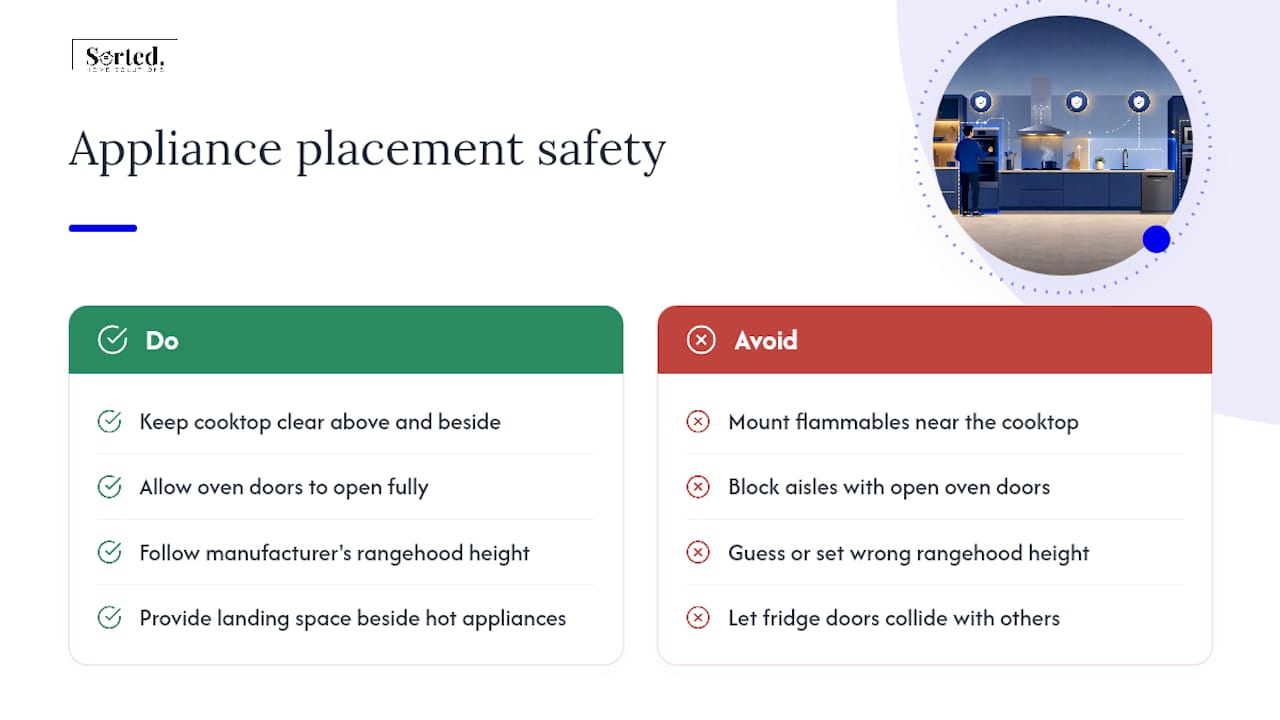
Appliance placement carries real safety consequences, not just convenience ones, and a handful of rules are worth treating as non-negotiable. Cooktops need clear space above and to the side, away from flammable materials like timber shelving or paper towel holders mounted too close to an open flame or induction surface.
Oven doors need enough clearance to open fully without hitting an island edge or blocking a walkway, particularly in a galley kitchen where the aisle is already tight. A door left open at knee height in a narrow aisle is a genuine trip hazard, especially in households with young children or older residents.
Rangehood height above the cooktop matters for both safety and performance: too low and it risks heat damage or an awkward reach over a hot surface, too high and it fails to capture steam and grease effectively. Follow the manufacturer’s specified height rather than guessing.
Fridge and freezer door swing needs checking against the surrounding cabinetry so the door doesn’t collide with an oven door opened at the same time, a common clash in smaller kitchens. Finally, keep a landing space free beside the oven and cooktop for setting down hot trays and pots. Without one, people end up balancing hot dishes on whatever surface is nearest, which is exactly how kitchen burns happen.
How a full-service renovator reduces kitchen planning risk
Coordinating a kitchen renovation means juggling a plumber, electrician, cabinetmaker and appliance supplier, all working to the same dimensions at the same time. A full-service renovator manages that coordination directly, handling trade sequencing, rough-in sign-off and final appliance verification against spec sheets before cabinetry locks anything in.
If you’re comfortable managing multiple trades and chasing spec sheets yourself, a DIY approach can work for a straightforward layout. For anything involving structural changes, integrated appliances, or a tight timeline, a managed process catches the mismatches before they become rework.
— Rudi
Get expert help planning your kitchen renovation
Getting the sequence right on paper is one thing. Coordinating the plumber, electrician, cabinetmaker and appliance delivery so nothing arrives before it’s needed is where most DIY renovation timelines slip. A full-service renovation company manages that whole sequence under one point of contact, from the initial brief through rough-in sign-off to the final appliance fit-off, so you’re not the one chasing five different trades to confirm a cavity dimension.

If you’re at the stage of comparing costs before committing to a full kitchen renovation, the kitchen and bathroom renovation pricing guide sets out package options for Auckland homeowners. For a fully managed renovation where trades, consents and appliance planning are handled end to end, get in touch through the full home renovation service page to talk through your kitchen brief.
Sources
Recommended
Comments