

3mm/3m Rule: When to Level Before Laying Flooring in NZ, DIY or Pro

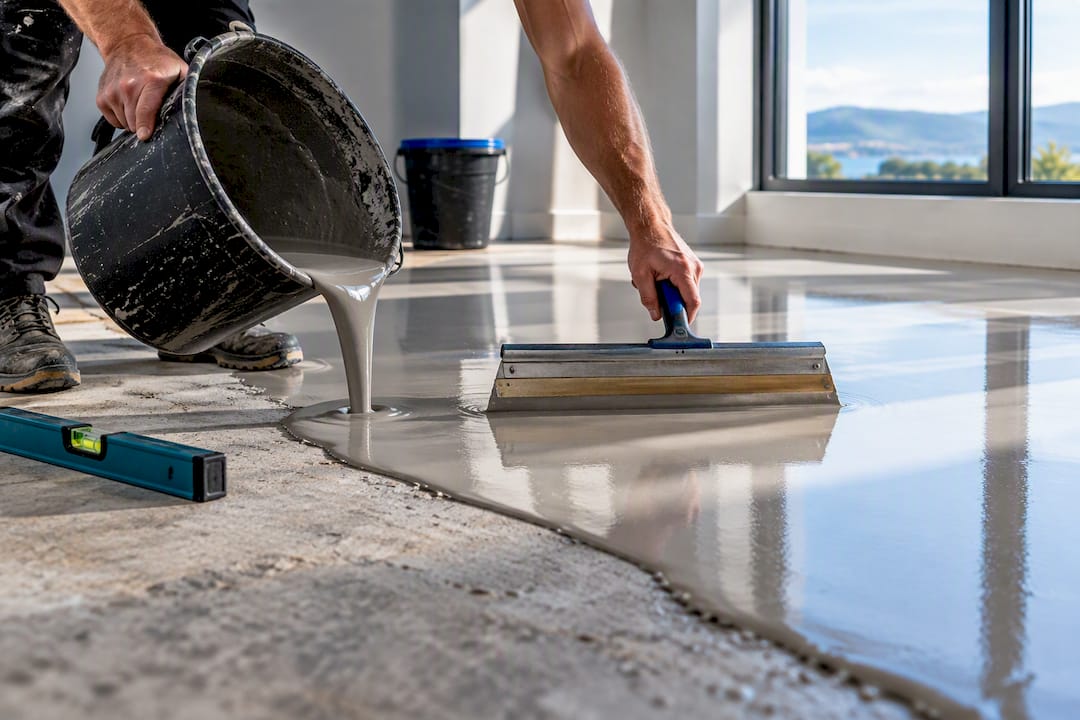
Yes, in most homes the subfloor needs some levelling before new flooring goes down. The deciding factors are flatness, moisture, and structural soundness. Run a 3 metre straightedge test and a moisture check first. If readings exceed the tolerances in the MBIE/BRANZ guide to tolerances, levelling or a specialist repair isn’t optional.
TL;DR:
Floors with moisture readings above the MBIE/BRANZ tolerances require professional repair or levelling, not DIY fixes.
Tile finishes demand the strictest flatness, allowing no more than 3 millimeters deviation over a 3-meter straightedge, while resilient flooring permits slightly more.
A thorough subfloor assessment must confirm flatness, dryness, cleanliness, and structural soundness before applying any levelling method.
Proper preparation, including priming and careful mixing, is critical to avoid failure when applying self-levelling compounds.
For complex or hidden issues like rot or rising damp, hiring a managed renovation team ensures code compliance and avoids rework.
Table of Contents
When you must level: decision criteria and tolerances
Floor levelling before flooring installation comes down to numbers, not guesswork. NZ guidance caps timber-framed floors at a slope of 1:200 and a deviation from level no greater than 5 mm across any 10 metre run, with concrete and other materials referencing separate NZS tolerances. In plain terms, if you laid a 10 metre straightedge across the room, the gap underneath it shouldn’t exceed a few millimetres anywhere.
How strict you need to be depends on the finish going down:
Tiles demand the tightest tolerance, since grout lines expose even small dips instantly.
Floating engineered timber tolerates more movement, thanks to its underlay and click-lock joints.
Resilient flooring (vinyl, lino) follows the FloorNZ U3 benchmark: no gap over 3 mm under a 3 metre straightedge where the manufacturer doesn’t specify its own figure.
Quick checks that flag a problem before you buy a single bag of compound: a straightedge test, visible dips or humps near doorways, and hollow or bouncy spots underfoot that suggest movement below the surface.
Assess the subfloor: a practical inspection checklist
A proper subfloor assessment covers four things: flatness, moisture, contamination, and structural integrity. NZQA’s unit standard for substrate evaluation requires installers to confirm a surface is clean, sound, flat, smooth, and dry before any levelling compound touches it, and that’s the same order homeowners should work through.
Measure flatness. Run a straightedge or spirit level across the room in several directions, and use a laser level for larger areas. Record every gap over 3 mm with its location, so you know where extra compound needs to go.
Check moisture. Use a moisture meter on timber or a hygrometer for relative humidity readings on concrete, following FloorNZ’s storage and moisture guidance for resilient materials. Elevated readings mean you fix the moisture source before levelling, not after.
Look for contaminants. Old adhesive residue, oils, paint, or dust from grinding can all stop a levelling compound from bonding properly. If the floor is pre 2000s and you suspect asbestos in old vinyl or backing, stop work and get it tested rather than sanding or grinding it yourself.
Check structural soundness. Loose boards, visible deflection when you walk across the room, or soft, rotten timber all point to a repair job that goes deeper than levelling.
Pro Tip: Photograph every problem spot with a tape measure in frame before you start. It saves an argument with yourself (or a tradesperson) three weeks later when you can’t remember which corner was 8 mm out.
If any of these checks come back with a serious result, particularly rot or structural movement, that’s the point to call in a specialist rather than push on with a DIY pour.
Levelling methods by substrate — what to use and why
The right levelling technique depends entirely on what’s under your feet. Treating concrete and timber the same way is one of the fastest routes to a failed floor.
Concrete. Minor high spots get ground back with a floor grinder. Genuine hollows and slope get filled with a self-levelling compound poured to the manufacturer’s minimum and maximum thickness, usually somewhere between a feather edge and 50 mm depending on the product. Grinding suits small, localised humps; pouring suits broad, gradual falls across a room.
Timber. Solid or particleboard subfloors typically need a cementitious flood coat over the whole area, targeted patching of low spots, or replacement of badly damaged boards. Ardex’s technical guidance is blunt about the common shortcut here: simply stacking underlay sheets over rough, uneven timber without a compatible levelling layer underneath is a frequent cause of failure once foot traffic starts working the joints.
Particleboard and ply. Direct-stick resilient flooring generally isn’t recommended straight onto particleboard, since it moves too much and telegraphs joints through thin vinyl. A cementitious underlayment or a purpose-made underlay sheet, correctly fastened, gives resilient flooring a stable base instead.
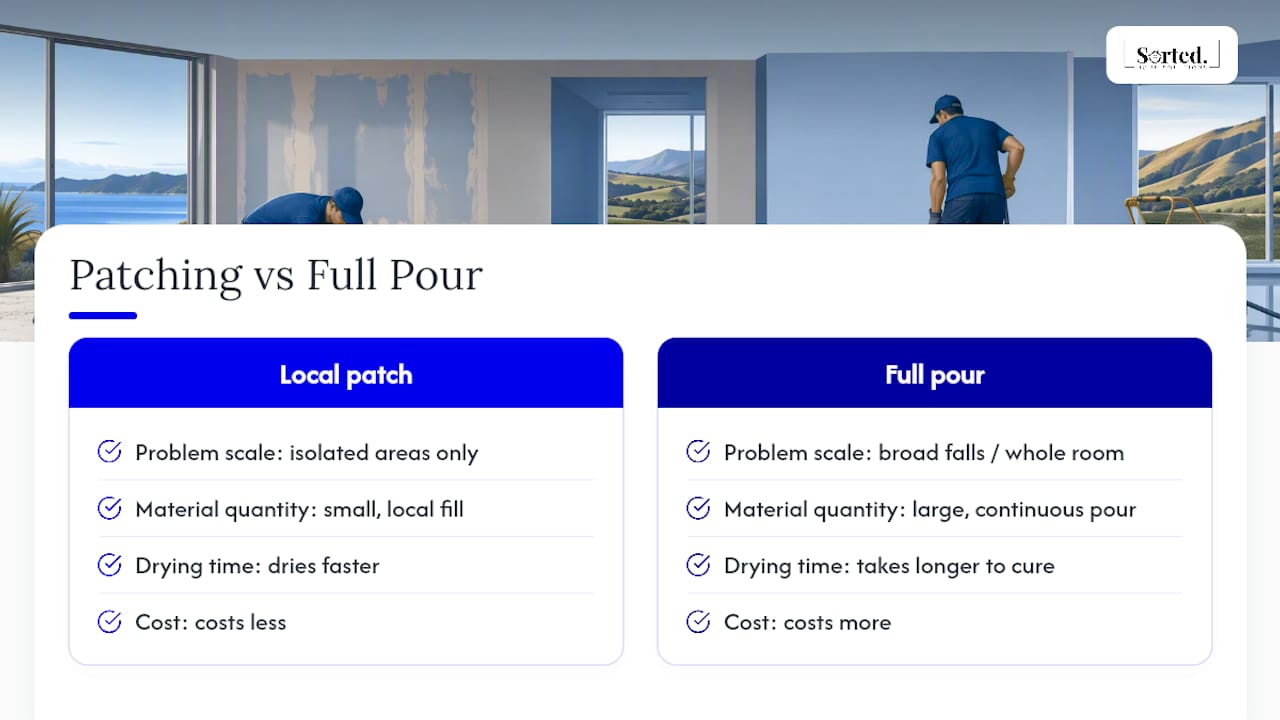
Localised patching costs less and dries faster than a full pour, but it only works when the problem is genuinely isolated. A full self-levelling pour costs more and takes longer to cure, though it delivers a flatter, more durable base across an entire room, which matters more under tile and less under a floating floor.
Step-by-step: applying a self-levelling compound correctly
Getting a self-levelling compound right is less about the pour and more about everything you do beforehand.
Protect the site. Mask skirting boards, seal doorways against dust, and clear the room completely.
Set up the mixing station near the pour area. Batch control matters here. A mixing station placed too far from the pour zone risks the compound beginning to set before it reaches the floor.
Prime the substrate. Match the primer to both the substrate and the levelling compound’s chemistry. Mismatched primer is one of the most common causes of delamination, so check the data sheet rather than grabbing whatever primer is on the shelf.
Mix in controlled batches. Work to the compound’s stated working time, not your own pace, and pour using guide rails or a levelling rake to control depth across the room.
Finish and verify. Use a smoothing tool or spiked roller to release trapped air, then leave the surface undisturbed until it sets.
Manufacturer technical data on ARDEX flooring products shows typical readiness windows of around 2 to 4 hours before a floor is walkable, with full readiness for tiling or resilient coverings varying by product and pour thickness. Always check the specific data sheet for your product rather than assuming a standard time applies.
Tools, materials and what to buy or hire
Most homeowners save money hiring the equipment they’ll use once and buying the consumables they’ll use up.
Hire: a floor grinder for concrete high spots, a levelling compound pump for larger pours, and a walk-behind mixer if you’re covering more than a small room.
Buy: hand tools (straightedge, spirit level, trowel), the correct primer for your substrate, and levelling compound itself.
Read the data sheet before buying. Check coverage per bag, minimum and maximum pour thickness, drying time, and substrate compatibility, since a compound rated for concrete won’t necessarily suit timber.
Source locally where possible. Buying levelling compound close to the job reduces the chance of it sitting in a hot car or shed and partially curing before you use it.
Common mistakes, failure modes and pro tips from installers
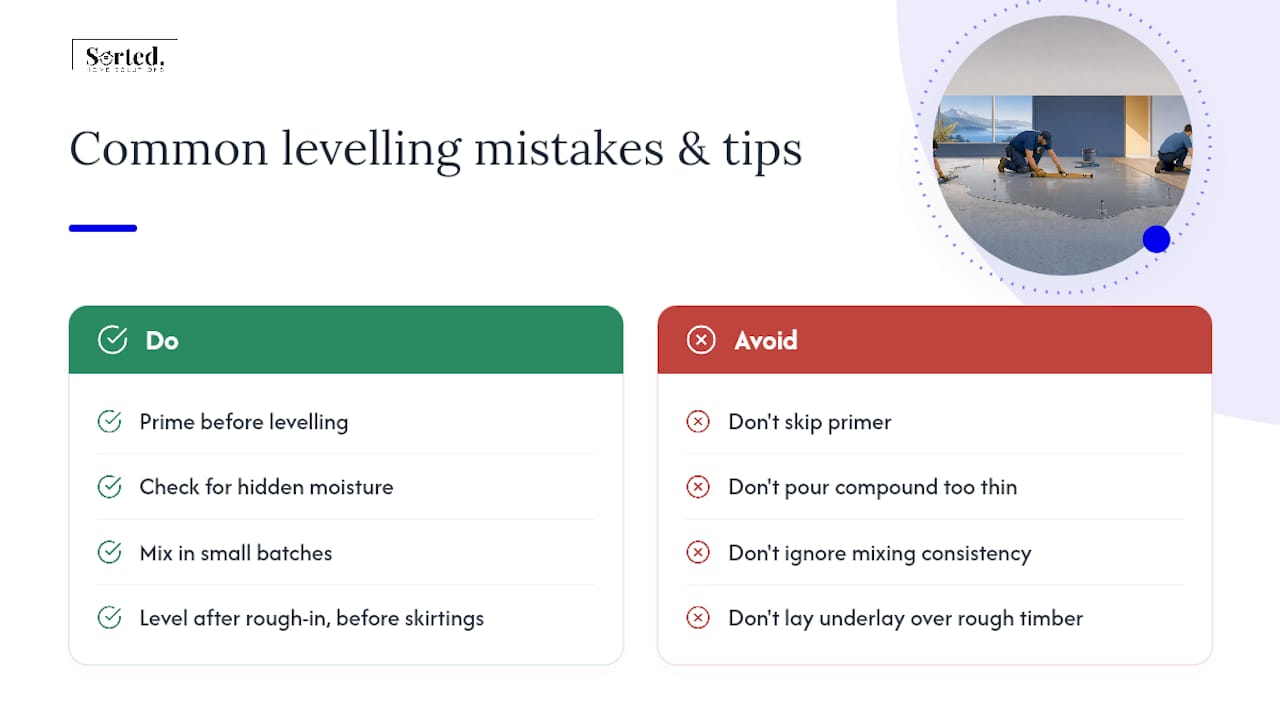
Most levelling failures trace back to one of four causes: skipping the primer, missing hidden moisture, poor mixing consistency, or pouring the compound too thin to do its job. Layering underlay sheets straight over rough timber without a proper levelling pass underneath is a shortcut that often looks fine on installation day and fails within months, once the boards beneath keep flexing under load.
Pro Tip: Mix in smaller batches than you think you need, especially on your first pour. It’s far easier to mix a second batch than to fight a compound that’s started setting in the bucket while you’re still spreading the first one.
Sequencing with other trades matters too. Levelling should happen after plumbing and electrical rough-in is finished under the floor, but well before skirting boards go back on.
When to hire a managed renovation team instead of DIY
Complex substrates, hidden moisture problems, or a job that needs plumbing, electrical, and flooring sequenced together are the point where DIY levelling stops making sense. A single point of contact coordinating trades and consent requirements avoids the rework that comes from one trade undoing another’s work.
— Rudi
Get a fixed-fee quote for levelling and flooring done right
Grinding, priming, pouring, and timing a self-levelling compound correctly is achievable for a straightforward room. It gets a lot harder once you’re dealing with rotten timber, rising damp, or a floor that needs plumbing moved before you pour. A managed renovation team coordinates the trades, the consent process, and the fixed-fee quote from one point of contact, so you’re not juggling a grinder hire, a plumber’s schedule, and a flooring installer’s availability all at once.

A typical assessment starts with a site inspection where flatness, moisture, and structural condition get checked against the same tolerances covered above, followed by a fixed-fee quote covering levelling and the flooring install together. If your project is a full room or a wider renovation, the Full Home Reno & Flood Restoration service handles it end to end, and for smaller jobs like fixture swaps or patch repairs alongside your flooring work, the services page covers what’s on offer. Check current pricing and request a site inspection to get a scoped quote before you commit to a DIY pour.
Authoritative standards and manufacturer guidance to consult
For readers who want the primary references behind these tolerances and methods:
MBIE/BRANZ guide to tolerances and the BRANZ tolerances tables
Ardex technical bulletin on levelling over timber substrates and NZQA unit standard 40260 for substrate evaluation
For general surface prep technique beyond flooring, Solshine’s homeowner guide to surface preparation is a useful companion read
Sources
FAQ
How long after self-levelling can you lay flooring?
Manufacturer data for ARDEX levelling products shows floors are often walkable within 2 to 4 hours, though readiness for tiling or resilient coverings takes longer and varies by product and pour thickness. Always check the specific data sheet for your compound rather than assuming a standard time.
What do you put on the floor before self-levelling?
A primer matched to both the substrate and the levelling compound’s chemistry goes down first, since mismatched primer is a leading cause of delamination. The substrate itself needs to be clean, sound, and dry, following the same checks in NZQA’s substrate evaluation standard.
Do I need to level the floor before vinyl flooring?
Usually yes, since resilient flooring shows imperfections easily. FloorNZ’s guidance sets a U3 benchmark of no gap over 3 mm under a 3 metre straightedge where the manufacturer hasn’t specified its own tolerance.
Are floors supposed to be perfectly level?
No, floors aren’t expected to be perfectly level, only within a defined tolerance. NZ guidance allows a maximum deviation of 5 mm over a 10 metre run on timber-framed floors, with separate NZS tolerances for concrete, so some minor variation is normal and acceptable.
Does Sortedhomesolutions handle floor levelling as part of a renovation?
Yes, Sortedhomesolutions coordinates subfloor assessment and levelling as part of its managed renovation and flooring services, alongside the trades needed to finish the job. Pricing depends on the scope of work, and current figures are available on the pricing page.
Recommended
Comments