

Avoid Cost Surprises: Drainage & Consent for a Second Bathroom in NZ

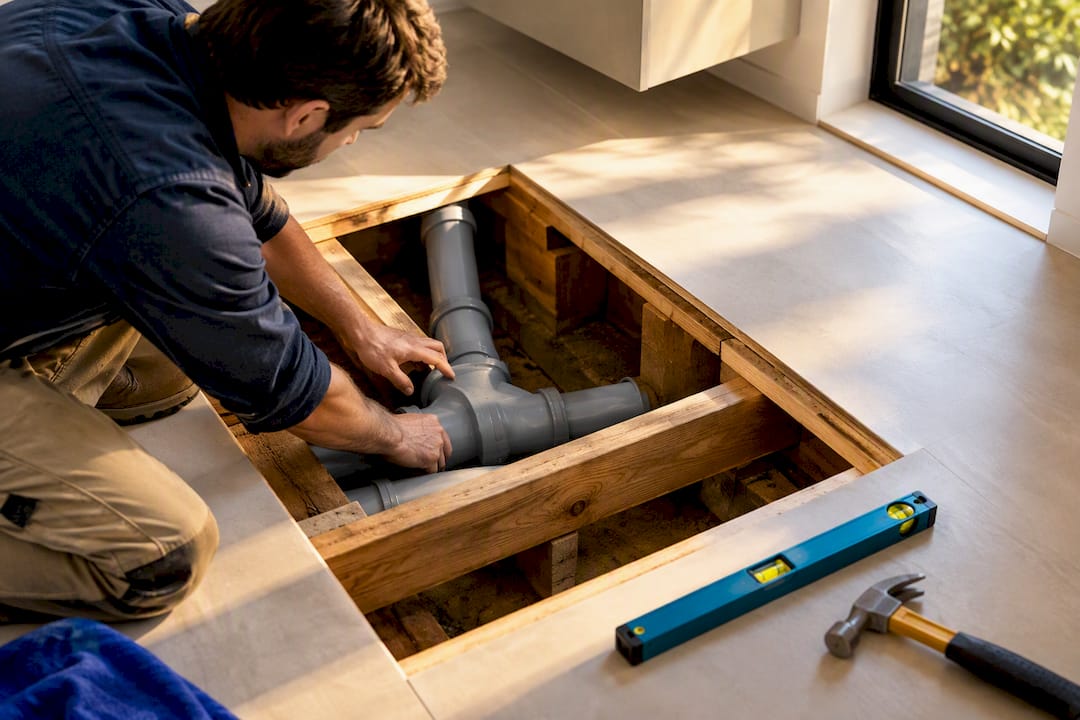
Adding a second bathroom or toilet in New Zealand is usually possible, but two things decide the outcome: where your drainage runs, and whether you’re adding a new sanitary fixture. Both determine whether you need building consent and what you’ll pay. A powder room might cost far less than a full ensuite with a tiled shower. Before pricing anything, get a plumber or designer to check drainage feasibility, then confirm the consent pathway with your council.
TL;DR:
Adding a second bathroom in NZ depends mainly on drainage placement and whether new fixtures are installed, affecting consent requirements and costs.
Costs vary widely: a toilet-only powder room near existing drainage can be relatively inexpensive, while a full bathroom with a tiled shower and extensive plumbing can significantly increase expenses.
Proper planning requires early drainage level checks, structural assessments, and detailed waterproofing plans with documentation such as a PS3 producer statement.
Building consent is usually necessary for new fixtures, with application content including drainage details, waterproofing proof, and safety glazing, often taking around 20 days to process.
Choosing experienced, fully licensed contractors with clear quotations and proper documentation helps avoid delays, extra costs, and resale issues linked to unpermitted work.
Table of Contents
What does it cost to add a second bathroom in NZ?
Cost hinges on what you’re building and how far it sits from existing drainage. A toilet-only powder room tucked near an existing waste stack is the cheapest option. A full second bathroom with a tiled shower, vanity, and new drainage run sits at the other end of the scale, and the gap between the two is wider than most homeowners expect.
Three broad categories cover most jobs:
Powder room or toilet-only addition: minimal fixtures, no shower, often reuses an existing wall cavity or under-stairs space.
Ensuite off an existing bedroom: toilet, vanity, and shower, usually needing new drainage and waterproofing.
Full second bathroom: bath or shower, vanity, toilet, and sometimes a new soil stack connection if it’s far from existing plumbing.
The main cost drivers aren’t the tiles or tapware, they’re the things you can’t see once the walls are closed up:
Distance to existing drainage. The further the new fixtures sit from the soil stack, the more pipework, excavation, and potentially a macerator pump you’ll need.
Structural work. Cutting through joists or adjusting floor framing to fit pipework adds engineering and labour costs.
Waterproofing and tiling. A fully tanked, tiled shower with a compliant membrane costs meaningfully more than a shower with a prefabricated liner.
Fixtures and labour. Trade rates for plumbing, electrical, and tiling stack up quickly, especially when several trades need to sequence their work around each other.
A written quote for a full bathroom addition should itemise design and consent documentation, plumbing and drainage, structural work if needed, waterproofing (including the PS3 producer statement), fixtures, tiling and finishes, and a contingency line. If a quote skips straight from “demolition” to “tiling” with no separate line for waterproofing or consent, ask why.
Pro Tip: Ask every quote to separate the consent and documentation cost from the build cost. Some homeowners get quoted a build price that quietly assumes consent won’t be needed, then get hit with an unbudgeted variation once council flags it.
Auckland Council’s own fee schedule gives a useful reference point: a qualifying minor plumbing alteration under $5,000 carries a $354 fee, with an additional inspection charge if the installer isn’t council-approved. That’s a small job by bathroom standards, but it shows how quickly documentation and inspection costs add up even before tiling starts.
Where can a second bathroom or toilet actually go?
Drainage decides placement long before layout preferences do. The most attractive spot for a new bathroom on paper, next to the master bedroom, under the stairs, at the end of a hallway, might be unworkable if the drain invert level and fall don’t line up.
Level’s guidance on wastewater design explains that every gravity drainage system needs a minimum gradient to carry waste away properly, and pipe runs beyond a certain length need venting to stop siphoning and odour problems. Get the invert level and fall checked early, because moving a drain connection after the design is locked in is one of the most expensive changes you can make mid-project.
Common placement options each come with trade-offs:
Back-to-back with an existing bathroom or kitchen. Sharing a wall with existing wet areas is usually the cheapest option because it taps into drainage that’s already there.
Directly above or below an existing bathroom. Works well in two-storey homes but needs careful joist coordination so pipework doesn’t clash with structural framing.
Under-stairs or hallway conversions. Space-efficient for a toilet or powder room, but often has limited floor depth for pipework and ventilation.
A new wing or extension. Gives full design freedom but usually means the longest, most expensive drainage run.
When gravity drainage genuinely won’t work, a macerator pump can move waste uphill or over longer distances. It’s a workable fix, but it adds an ongoing maintenance item, a modest running cost, and in some cases a question mark over council acceptance depending on the installation. Treat it as a fallback for awkward sites, not a default choice.
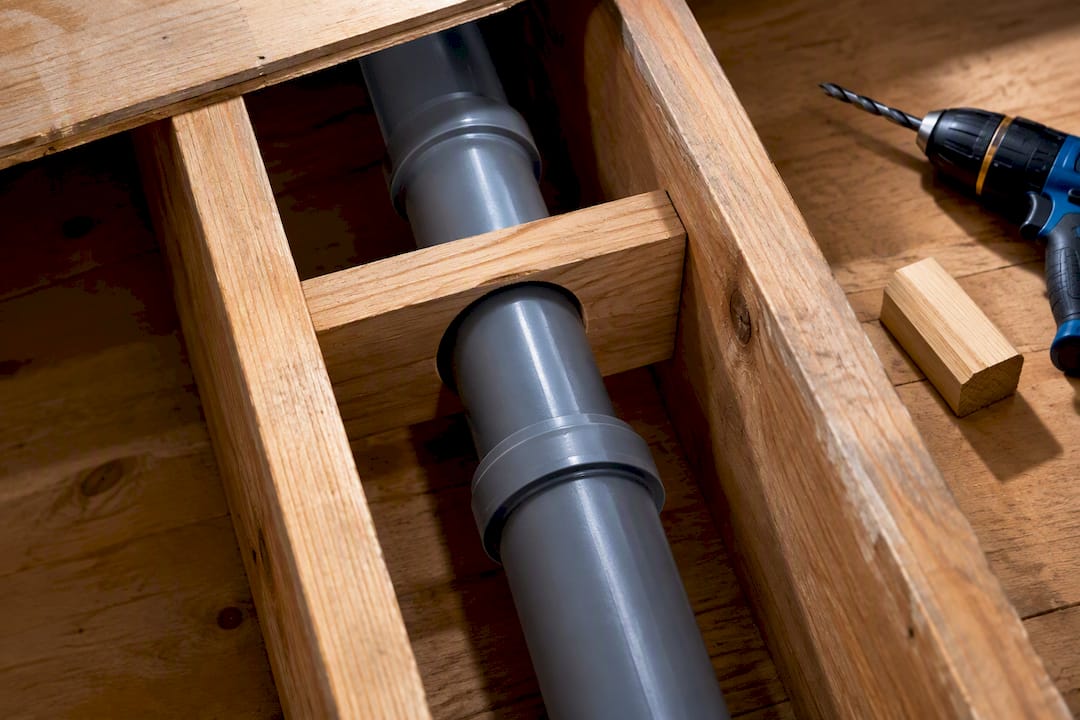
Structural limits matter just as much as drainage. Cutting new pipe penetrations through floor joists, especially in older timber-framed homes with shallower floor depths, can weaken the structure if done without proper support. If your renovation involves notching or drilling joists beyond minor allowances, a structural engineer will need to sign off before you proceed.
Do you need building consent to add a bathroom?
In most cases, yes. Building sets a clear rule: an authorised person can alter existing sanitary plumbing without consent, but only if the total number of sanitary fixtures in the building doesn’t increase. The moment you add a new toilet, shower, or vanity where none existed, you’ve crossed into consent territory.
A consent application for a bathroom addition typically needs to include:
Drainage details, including pipe sizes, gradients, and venting arrangements.
Plumbing layout, showing how new fixtures connect to existing services.
Waterproofing producer statement (PS3), confirming the membrane system meets Building Code requirements.
Safety glass specifications, for shower screens and any glazing near wet areas.
Hot water cylinder location, if the addition affects hot water supply or storage.
Auckland Council notes that a complete building consent application can take up to 20 working days to assess, but that clock only starts once everything required is actually submitted. Incomplete applications trigger a Request for Further Information (RFI), which pauses the assessment clock until you respond. Common RFI triggers for bathroom work include missing wall-to-fixture junction details, unclear tiled-shower construction drawings, and absent floor joist spacing information for tile deflection.
This is where hiring a Licensed Building Practitioner (LBP) designer or a consent professional pays for itself. Someone who prepares bathroom consent packages regularly knows exactly what council reviewers look for, and a well-prepared application avoids the RFI cycle that can add weeks to your timeline.
What waterproofing does council actually expect?
Waterproofing isn’t a cosmetic layer you add before tiling, it’s a documented system that has to meet Building Code durability standards. BRANZ’s guidance on tiled showers recommends a continuous membrane under and behind tiles in wet areas, built to last the durability period required under Clause B2 of the Building Code, commonly cited as a 15-year expectation for this kind of building element.
Getting this right on paper usually means:
Full waterproof membrane coverage, not just around the shower base but often across the entire wet area floor.
A PS3 producer statement, issued by the membrane applicator confirming the system was installed to specification.
Coordination between trades. The membrane applicator, tiler, and plumber all need to sequence their work correctly, since tiling over an unfinished or damaged membrane creates a leak risk that’s expensive to fix later.
Leaks in tiled showers rarely happen mid-floor. They happen at junctions: where the wall meets the floor, around tiled nibs, at drain connections, and near joist lines where flex in the floor can crack a membrane over time. A properly detailed waterproofing plan addresses each of these junctions specifically rather than treating the whole floor as one uniform surface.
How long does the whole project take, and what does it cost line by line?
Consent assessment is only one part of the timeline. Once council issues consent, you still need to build, get inspections at key stages, and finally apply for a Code Compliance Certificate (CCC) before the work is legally signed off.
A realistic phased schedule looks like this: feasibility and drainage checks first, then design and consent lodgement, then rough-in plumbing and waterproofing, then finishes, then final inspection and CCC. Each phase depends on the one before it, so a delay early (an incomplete consent application, for instance) pushes everything else back.
Cost item | What it covers |
Design and drawings | Layout plans, plumbing schematics, elevation details |
Building consent fees | Council assessment and processing |
Plumbing and drainage | New pipework, connections, venting |
Structural work | Joist reinforcement or engineer sign-off if needed |
Waterproofing | Membrane system and PS3 producer statement |
Tiling and finishes | Floor and wall tiles, paint, fixtures fitting |
Fixtures | Toilet, vanity, shower, bath if included |
Contingency | Buffer for unexpected issues once walls are opened |
Treat the contingency line as non-negotiable rather than optional. Once you open up a wall or floor in an older home, you sometimes find drainage that doesn’t match the original plans, and that discovery is far more common than most first-time renovators expect.
How do you choose and manage the right contractor?
The questions you ask upfront matter more than the glossy portfolio photos. Before signing anything, ask a prospective contractor or designer:
Can you show me examples of consented bathroom additions you’ve completed, not just renovations of existing bathrooms?
Who provides the PS3 producer statement for waterproofing, and is that included in the quote?
Is your quote fixed-fee, and what specifically triggers a variation?
Which trades do you coordinate directly, and who is my single point of contact if something goes wrong?
Selection criteria worth weighing: LBP involvement in the design and consent process, a fixed-fee quote rather than an open-ended estimate, direct coordination of all trades rather than you managing separate contractors, and a clear warranty on completed work.
Consumer NZ’s guidance on the building process recommends putting every variation in writing before work proceeds, deciding early who is actually managing the project day to day, and locking in fixtures and finishes before the build starts rather than mid-way through. Changing your mind on tile choice after the waterproofing membrane is down isn’t just inconvenient, it can mean redoing completed work.
Pro Tip: If a contractor can’t produce a PS3 from a past job on request, that’s a red flag worth taking seriously. It usually means waterproofing wasn’t documented properly, which becomes your problem at resale, not theirs.
Watch for vague scope documents that don’t separate consent costs from build costs, reluctance to name the waterproofing applicator, and quotes that seem unusually low compared to others, since that gap is often where corners get cut on documentation.
Does a second bathroom actually add resale value in NZ?
A second bathroom is one of the more reliably valued additions in the New Zealand housing market, particularly in three and four bedroom homes where a single bathroom creates a genuine bottleneck for families and flatmates. Buyers touring an open home notice a second toilet almost immediately, especially in households with teenagers, multiple adults, or guests staying regularly.
The value impact tends to scale with how well the addition matches the house. A well-finished ensuite off the master bedroom in a mid-range family home often appeals strongly to buyers upgrading from a smaller property. A poorly integrated bathroom, one that eats into a bedroom’s usable space or sits awkwardly off a hallway with no natural light or ventilation, can undercut the value gain the addition was meant to create.
Documentation matters at resale too. A second bathroom built without consent, or one missing its Code Compliance Certificate, can complicate a sale. Buyers’ solicitors and building inspectors routinely check for CCCs on any obvious structural addition, and an unconsented bathroom can become a negotiating point that costs you more than the consent fee would have. A properly consented, well-documented addition avoids that entirely and gives buyers confidence the work was done to standard.
What layout options work in tight NZ homes?
Older New Zealand homes, particularly the classic villa and bungalow stock common in Auckland, weren’t designed with a second bathroom in mind. Space-saving layouts matter more here than in newer builds with generous floor plans.
A few layouts consistently work well in tight spaces:
Corner toilets and offset vanities. Angling fixtures into corners frees up circulation space in a small footprint.
Sliding or pocket doors. Removing the swing radius of a hinged door can be the difference between a workable powder room and a cramped one.
Wall-hung toilets and vanities. Mounting fixtures off the floor makes a small room feel larger and simplifies cleaning underneath.
Under-stairs conversions. Often just enough space for a toilet and small basin, ideal where a full bathroom isn’t feasible.
Shower-over-bath or shower-only configurations. Skipping a separate bath frees significant floor area in an ensuite.
Door choice matters more than most homeowners think in a tight layout. A well-chosen interior door that suits the clearance available can make a compact bathroom feel considerably more functional than a standard hinged door forcing an awkward swing path.
What goes wrong when retrofitting older NZ homes?
Older houses hide problems that newer homes simply don’t have. Villas and bungalows built decades ago often have shallower floor framing, inconsistent stud spacing, and drainage laid out for a very different plumbing standard than what’s used today.
The most common pitfall is discovering, mid-renovation, that the assumed drainage route doesn’t actually have the fall required, or that a joist sits exactly where a pipe needs to pass through. This is why a feasibility check before design, not after, saves money. Retrofitting also often uncovers old, undocumented plumbing work from previous owners, sometimes done without consent, that needs to be brought up to standard before new work can proceed.
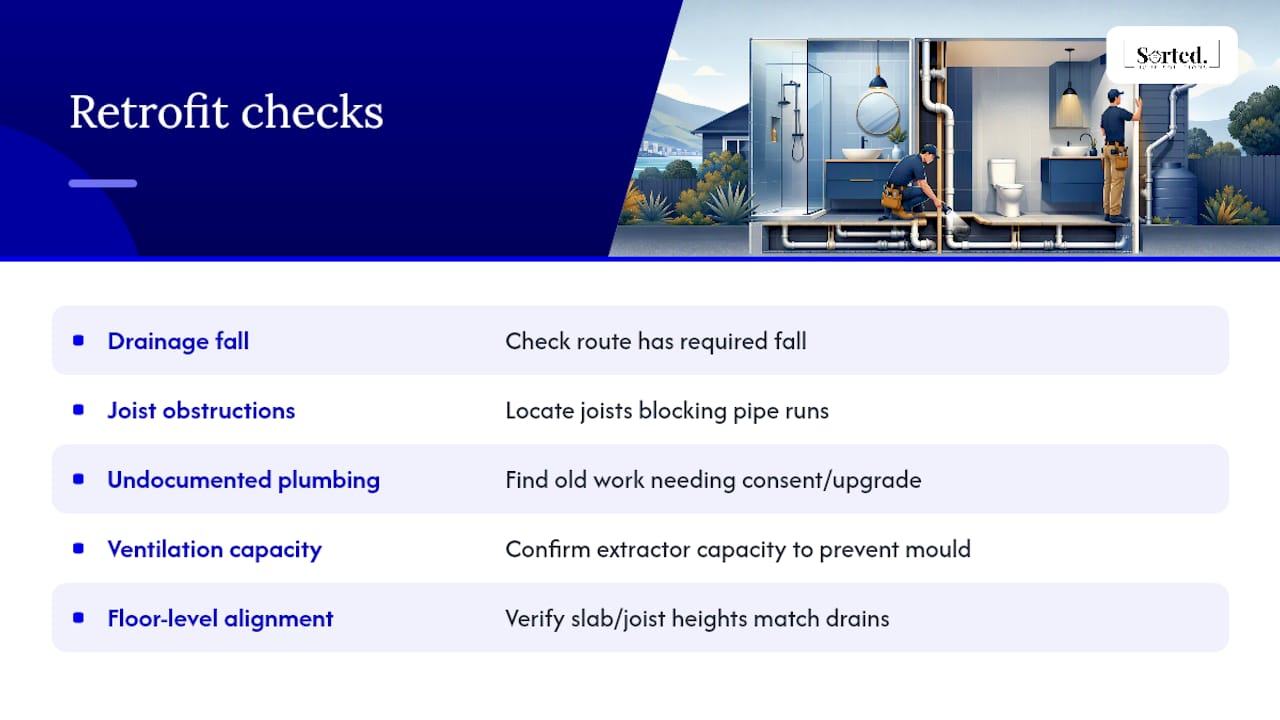
Ventilation is another recurring issue. Older homes frequently lack the extraction capacity a new wet area needs, and adding a bathroom without addressing ventilation properly creates ongoing moisture problems that show up as mould months after the tiler has packed up. Floor level changes between an old hallway and a new bathroom addition can also catch people out, particularly where an existing slab or joist height doesn’t naturally align with the new room’s plumbing requirements.
How Sorted Home Solutions typically manages a second-bathroom project
A professional renovation contractor can coordinate the full process end to end, from feasibility checks through design, consent lodgement, and trade sequencing, so homeowners deal with one point of contact rather than juggling separate trades and consent professionals. Fixed-fee bathroom packages can give clients cost certainty before work starts, and coordinating consent documentation directly with council helps reduce RFI delays that catch out DIY-managed projects.
— Rudi
Get your second bathroom project sorted from feasibility to finish
A full-service renovation provider offers an alternative to juggling separate tradespeople for a second bathroom build. Rather than managing multiple contractors yourself, one team can manage feasibility, drainage checks, consent lodgement, and all trades under a fixed-fee quote agreed before work starts.
That single point of contact matters most in the moments a DIY-coordinated project usually breaks down, waterproofing PS3 paperwork, RFI responses, and trade scheduling clashes. Sorted Home Solutions handles all of it as part of its bathroom renovation service, with package tiers, Bathroom Grade A, Bathroom Grade B, and Bathroom Grade C, covering different scopes of work. Full pricing detail for each grade sits on the pricing page.
If your project is bigger than a single bathroom, the full home renovation service covers combined works under the same fixed-fee approach. Start by getting in touch to arrange a feasibility check for your property.
Sources
FAQ
Do I need a building consent to add a second toilet in NZ?
In most cases, yes, because adding a toilet where one didn’t exist increases the total number of sanitary fixtures in the building. Building.govt.nz’s guidance confirms this triggers consent, while simply repositioning an existing toilet by an authorised person often doesn’t.
How much does it cost to add a bathroom in New Zealand?
Cost depends heavily on scope: a toilet-only powder room near existing drainage costs far less than a full ensuite with a tiled shower and new drainage run. Ask any quote to itemise design, consent, plumbing, waterproofing (including the PS3), fixtures, and a contingency so you can see exactly what’s driving the price.
Do you need planning permission for a second toilet?
New Zealand uses building consent rather than planning permission for this kind of work, and Auckland Council notes that adding a fixture where one didn’t exist may require it, even for minor plumbing jobs under $5,000. Check with your council early, since requirements can vary by property and existing consent history.
Can I add a toilet to an existing bathroom?
Yes, and this is often more straightforward than a standalone second bathroom because you’re already working with existing drainage and ventilation. It still counts as adding a sanitary fixture, though, so it typically needs consent even when the surrounding walls and services are already in place.
Will a second bathroom increase my home’s value?
A well-integrated, properly consented second bathroom tends to appeal strongly to buyers, particularly in family homes where one bathroom creates a genuine bottleneck. The value gain depends on quality of integration and documentation, an unconsented addition without a Code Compliance Certificate can complicate a sale rather than help it.
Recommended
Comments