

Kitchen splashback ideas for New Zealand homes (2026)

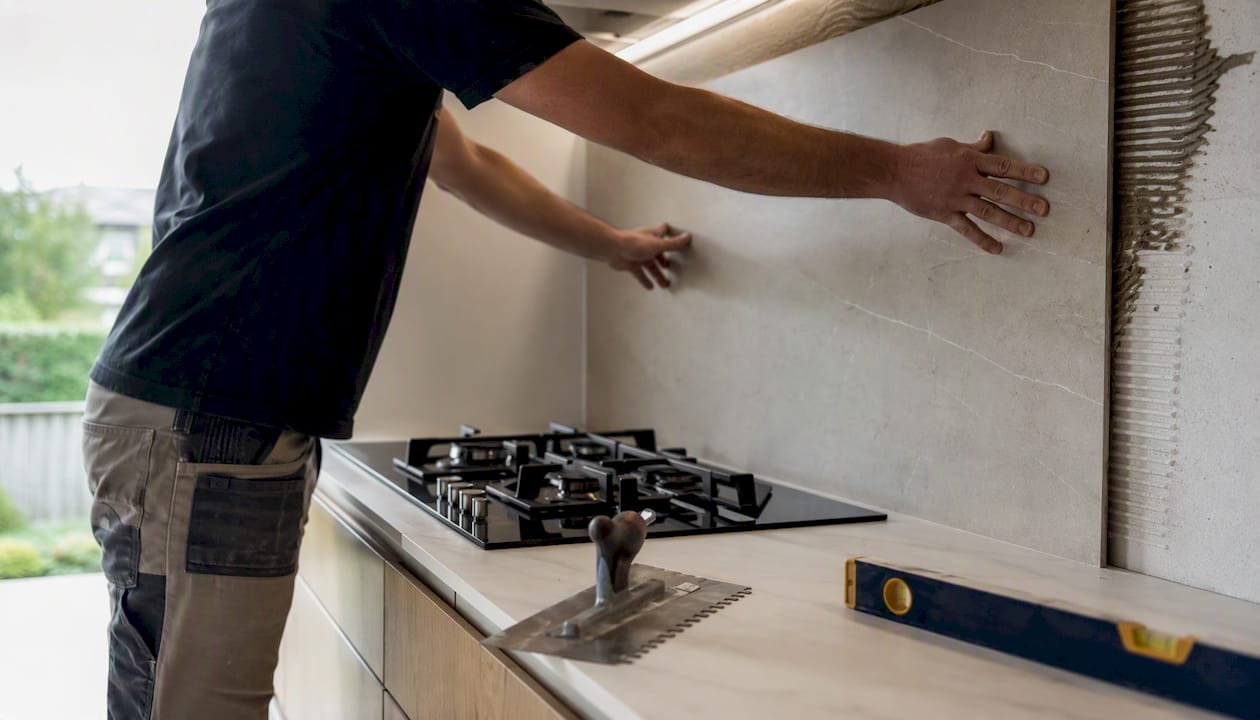
For most New Zealand kitchens, large-format porcelain or toughened glass give the best balance of durability, hygiene, and style. Both handle heat well, clean easily, and suit the full range of NZ conditions from inner-city apartments to coastal baches. Stainless steel is the third practical choice, particularly behind a heavy-use range or in a coastal home where corrosion resistance matters.
Here are the top material choices to consider now:
Large-format porcelain slab — near-zero porosity, no grout lines, handles heat and humidity without sealing
Toughened glass (painted or printed) — seamless wipe-clean surface, maximises light in smaller kitchens, strong visual impact
Stainless steel (316 grade for coastal) — industrial durability, heat-proof, the practical pick for heavy cooking or salt-air environments
Ceramic or porcelain tile — flexible budget range, huge design variety, durable when installed with epoxy grout
Acrylic solid-surface — budget-friendly, quick to install, best for low-heat zones away from a gas hob
If you want the full project managed, including certified trades and gas compliance, contact Sortedhomesolutions for a quote before you commit to a material.
Key takeaways
For most NZ kitchens, large-format porcelain or toughened glass deliver the best combination of durability, low maintenance, and visual impact, with stainless steel the right call for coastal or heavy-use situations.
Point | Details |
Best all-round materials | Large-format porcelain and toughened glass suit most NZ kitchens for durability and low maintenance. |
Gas hob compliance | AS/NZS 5601.1 and the Gas (Safety and Measurement) Regulations 2010 set legal requirements; always use a registered gasfitter. |
Coastal specification | Specify 316 marine-grade stainless fixings and epoxy grout within 1 km of the coast. |
Cost range (Auckland, 2026) | Installed costs cover a wide spectrum depending on material choice and installation complexity. |
Managed renovation | Sortedhomesolutions coordinates all trades, gas compliance, and consent for kitchen splashback projects in Auckland. |
Table of Contents
20 kitchen splashback ideas that work in New Zealand homes
These ideas draw from the mix of bold printed glass, large-format porcelain, textured tiles, and full-height finishes common across Kiwi homes. Each entry includes a material tag, a style note, and a practical note for NZ conditions.
Mirrored glass behind the hob (toughened glass) — Doubles perceived depth in a small kitchen. Requires precise templating; keep grease-free with a daily wipe.
Printed glass with a botanical or landscape image (toughened printed glass) — Custom artwork baked into the glass surface. UV-stable and fully wipe-clean; order a large sample before committing.
Full-height porcelain slab in a stone look (large-format porcelain) — Runs floor to ceiling with no grout lines. Suits family kitchens; near-zero maintenance and excellent heat tolerance.
Classic white subway tile with epoxy grout (ceramic tile) — Timeless, budget-accessible, and easy to source in NZ. Epoxy grout resists staining far better than cement-based alternatives.
Handmade Zellige accent wall (glazed terracotta tile) — Irregular surface and rich colour variation add texture. Seal the grout; not ideal directly behind a high-output gas hob without a fire-rated backing board.
Stainless steel sheet behind a range cooker (316 marine-grade stainless) — Professional kitchen look, fully heat-proof, and the right choice for coastal homes. Polish with a microfibre cloth; avoid abrasive pads.
Textured neutral large-format porcelain (large-format porcelain) — Linen or concrete-look surfaces add depth without pattern. Low maintenance; suits open-plan kitchens where the splashback is visible from the living area.
Vertical stacked tile layout (porcelain tile) — Rotates a standard tile 90° and stacks it vertically to draw the eye upward. Works well in kitchens with low ceilings.
Integrated window splashback (toughened glass / aluminium frame) — Replaces the wall between benchtop and overhead cabinetry with a glazed opening. Maximises natural light; requires structural assessment.
Benchtop-continued stone slab (engineered stone or porcelain) — The benchtop material runs straight up the wall for a seamless, high-end finish. Raises cost and requires precision fabrication, but adds perceived value.
Coloured toughened glass (bold single colour) (painted toughened glass) — A single saturated colour (deep green, navy, terracotta) makes the splashback a feature. Light-reflective; suits apartments where the kitchen is compact.
Mosaic tile feature strip (glass or porcelain mosaic) — A narrow band of mosaic at eye level breaks up a plain tile field. Easy to clean; use epoxy grout to keep the joints tight.
Faux-brick porcelain tile (porcelain tile) — Gives an industrial or heritage look without the weight or porosity of real brick. Suitable behind a gas hob with correct clearances confirmed.
Chalkboard-finish panel (specialist paint on fibre cement or MDF) — Functional and playful for a family kitchen. Keep away from direct heat and steam; not suitable as the primary splashback behind a hob.
Fluted or ribbed porcelain tile (porcelain tile) — Three-dimensional surface adds shadow and texture. Wipe with a soft cloth; the ridges collect grease, so position away from the hob where possible.
Metallic or brushed-brass tile (metal-finish porcelain or real metal tile) — Warm tones suit timber cabinetry. Check the manufacturer’s heat rating before placing directly behind a gas cooktop.
Large-format marble-look porcelain (porcelain slab) — All the visual drama of marble with none of the sealing upkeep. Suits coastal homes; non-porous and corrosion-resistant.
Concrete-look acrylic panel (acrylic solid-surface) — Budget-friendly and quick to install. Best in low-heat zones; do not use directly behind a gas hob.
Coloured grout with white tile (ceramic or porcelain tile) — A charcoal or terracotta grout transforms a plain white tile into a graphic pattern. Use epoxy grout to prevent discolouration over time.
Full-height engineered stone panel (engineered stone / quartz) — Durable, non-porous, and available in a wide colour range. Requires professional templating and installation; adds strong resale appeal.
Which splashback material suits your NZ kitchen?
Choosing between materials comes down to four practical factors: heat exposure, coastal conditions, cleaning habits, and budget. Here is a clear breakdown of each option.
Toughened glass (painted, printed, or mirrored)
Toughened and decorative glass is widely used in NZ kitchens for its seamless, wipe-clean surface and strong visual impact. A single sheet with no joints means no grout to scrub. It requires accurate templating and professional installation; a sample chip will look different at scale, so always view a large panel before ordering.
Pros: Seamless surface, maximises light, fully customisable (colour, print, mirror), easy to clean
Cons: Precise templating required, can show fingerprints, chips at edges if knocked hard
Maintenance: Warm soapy water or a glass cleaner; non-abrasive cloth only
Coastal suitability: Good, provided edges are sealed and fixings are stainless or aluminium
Installed cost (NZ, 2026): Approximately $300–$700 per linear metre installed, depending on size and print complexity
Best for: Small apartments, light-filled kitchens, feature walls behind a hob
Ceramic and porcelain tiles
Ceramic and porcelain tiles remain the most flexible splashback option in NZ, covering budgets from modest to premium. Porcelain is denser and more water-resistant than ceramic, making it the better choice for high-humidity or coastal kitchens. Large-format porcelain slabs take this further: near-zero porosity, no grout lines, and a low-maintenance finish that suits humid or coastal environments.
Pros: Huge design range, heat-resistant, durable, widely available in NZ
Cons: Grout lines require maintenance; cement grout stains over time
Maintenance: Wipe tiles with a damp cloth; use epoxy grout to reduce staining
Coastal suitability: Good for porcelain; seal grout in coastal homes
Installed cost (NZ, 2026): Approximately $150–$450 per square metre installed for standard tiles; large-format porcelain slabs $400–$900 per square metre installed
Best for: Family kitchens, rental properties, any budget
Engineered stone and quartz
Engineered stone gives a premium, non-porous surface that does not need sealing. Running the benchtop material up the wall creates a seamless, high-end finish, though it raises cost and requires precision fabrication. Quartz-based engineered stone handles moderate heat but can be damaged by sustained direct heat, so a trivet or hob guard is advisable.
Pros: Non-porous, no sealing required, premium look, strong resale appeal
Cons: Higher cost, can be damaged by prolonged direct heat, heavy
Maintenance: Wipe with a damp cloth; avoid abrasive cleaners
Coastal suitability: Excellent; non-porous and corrosion-resistant
Installed cost (NZ, 2026): Approximately $500–$1,100 per square metre installed
Best for: Upscale renovations, benchtop-to-wall continuity
Natural stone (marble, granite, travertine)
Natural stone is porous and requires regular sealing, which makes it higher maintenance than engineered alternatives. Marble in particular stains and etches with acidic liquids. In a coastal home, salt air can accelerate surface degradation if the stone is not sealed and maintained consistently.
Pros: Unique natural variation, premium aesthetic
Cons: Porous, requires sealing every 1–2 years, etches with acids, higher cost
Maintenance: Seal regularly; clean with pH-neutral products only
Coastal suitability: Moderate; requires diligent sealing and edge protection
Installed cost (NZ, 2026): Approximately $600–$1,400 per square metre installed
Best for: Low-traffic kitchens where aesthetics outweigh maintenance concerns
Stainless steel (316 marine grade for coastal homes)
Stainless steel is the most heat-tolerant splashback material available and the standard choice behind commercial-style ranges. For coastal NZ homes, specify 316 grade rather than 304; the higher molybdenum content resists salt-air corrosion. Fingerprints and water marks show readily on a polished finish; a brushed finish hides daily marks better.
Pros: Fully heat-proof, hygienic, corrosion-resistant (316 grade), long lifespan
Cons: Shows fingerprints and water marks, can dent, industrial aesthetic not for every kitchen
Maintenance: Wipe with a damp microfibre cloth; never use steel wool or abrasive pads
Coastal suitability: Excellent with 316 grade; rinse regularly to remove salt residue
Installed cost (NZ, 2026): Approximately $350–$750 per square metre installed
Best for: Heavy-use kitchens, coastal homes, behind range cookers
Acrylic and solid-surface panels
Acrylic splashbacks are the most budget-accessible option and install quickly with adhesive. They are not suitable directly behind a gas hob because they cannot handle sustained high heat. In low-heat zones, such as behind a sink or on a side wall, they perform well and are easy to replace.
Pros: Low cost, quick installation, lightweight, available in many colours
Cons: Not heat-resistant enough for gas hobs, can scratch, lower perceived value
Maintenance: Wipe with a soft damp cloth; avoid abrasive cleaners
Coastal suitability: Good; non-porous and unaffected by humidity
Installed cost (NZ, 2026): Approximately $100–$300 per square metre installed
Best for: Low-heat zones, rental properties, tight budgets
Pro Tip: Large-format porcelain slabs are increasingly the go-to choice in 2026 for homeowners who want a premium look without the maintenance of natural stone. Their near-zero porosity means no sealing, no staining, and no grout lines to scrub.
What does a NZ kitchen splashback cost to install in 2026?
Installed costs in Auckland tend to sit at the upper end of NZ ranges, reflecting higher labour rates and material freight costs. The figures below are indicative 2026 ranges for a standard kitchen splashback (approximately 1–2 square metres behind a hob, not full-height).
Material | Installed cost range (NZ, 2026) | Typical project timeline |
Acrylic panel | $100–$300 per m² | 1–2 days |
Ceramic tile (standard) | $150–$300 per m² | 2–4 days |
Porcelain tile (standard) | $150–$450 per square metre installed | 2–4 days |
Toughened glass | $300–$700 per m² | 5–10 days (templating + fabrication) |
Stainless steel (316) | $350–$750 per m² | 3–7 days |
Engineered stone / quartz | $500–$1,100 per m² | 7–14 days |
Large-format porcelain slab | $400–$900 per m² | 5–10 days |
Natural stone | $600–$1,400 per m² | 7–14 days |
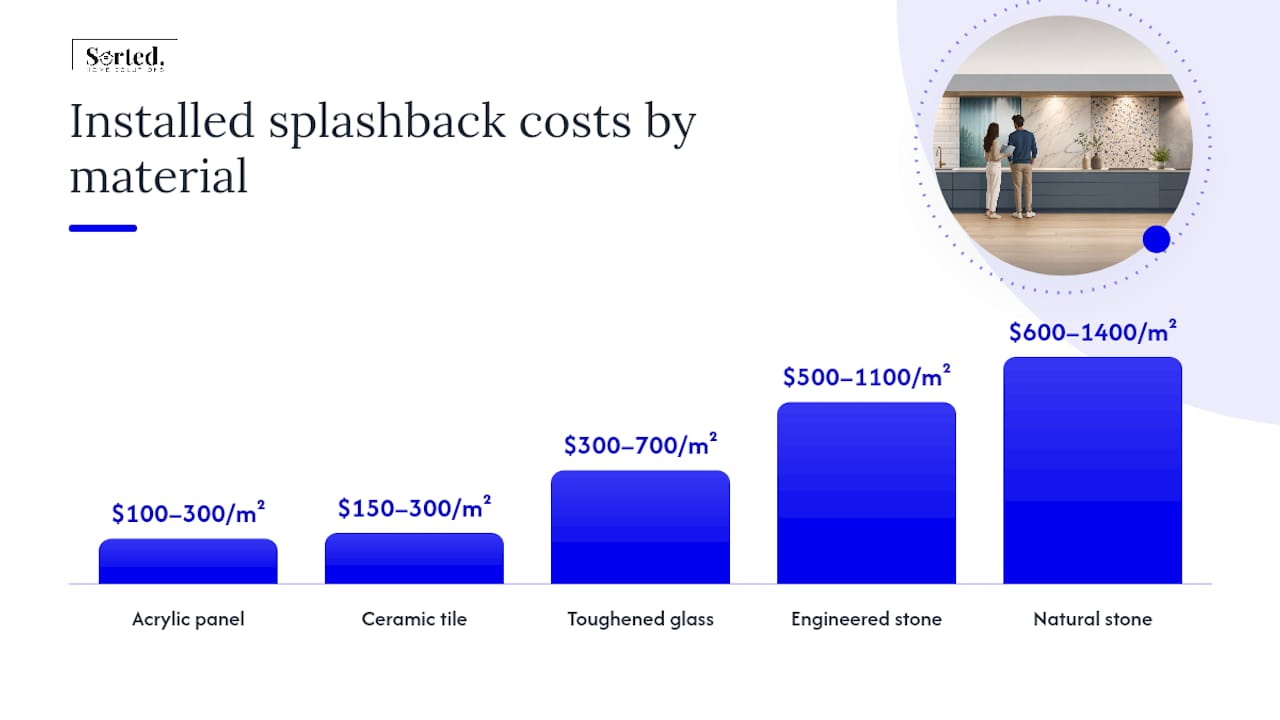
For a full kitchen renovation package price guide covering Auckland in 2026, including splashback work within a broader project, the Sortedhomesolutions pricing guide sets out what is typically included.
What drives the final price?
Full-height vs partial: A full-height splashback from benchtop to ceiling uses significantly more material and labour than a standard 600mm band.
Cut-outs: Power points, window reveals, and tap penetrations add templating time and waste material.
Benchtop continuity: Running the benchtop material up the wall requires precision fabrication and adds cost.
Coastal-grade materials: 316 stainless or marine-grade fixings cost more than standard equivalents.
Certified trades: If a gasfitter is required to disconnect and reconnect a gas hob, that adds a separate trade cost.
Site prep: Removing an existing splashback, repairing substrate damage, or waterproofing behind the new material adds time and cost.
Building consent is not typically required for a like-for-like splashback replacement, but any work that involves moving gas connections or altering the building envelope may trigger a consent requirement. Confirm this with your installer before work begins.
NZ rules and safety you need to know before installing a splashback
The legal framework for splashback installation in New Zealand is straightforward: if there is a gas cooktop involved, the Gas (Safety and Measurement) Regulations 2010 require that the installation follows either a certified design or the referenced parts of AS/NZS 5601. Non-compliance carries legal penalties.
AS/NZS 5601.1:2022 sets the technical requirements for gas installations, including clearances between gas appliances and surrounding surfaces. The standard defines what materials can be used, what clearances must be maintained, and when a fire-rated backing board or air gap is required. Anyone who designs, installs, or tests a gas installation must follow WorkSafe’s design and construction guidance, and any deviation from the standard means of compliance requires a certified design that must be documented for seven years.
WorkSafe confirmed that from 13 November 2025, installers could choose to use either the 2013 or 2022 edition of AS/NZS 5601.1 during a transitional period. From 12 November 2026, the new cited standards become compulsory. If your project is underway or planned before that date, confirm with your gasfitter which edition they are working to.
Checklist before booking your installer
Confirm whether your cooktop is gas, electric, or induction (gas triggers the AS/NZS 5601 requirements)
Ask the installer which edition of AS/NZS 5601.1 they are using and whether a certified design is required for your configuration
Verify the installer holds a current gasfitter registration if gas work is involved
Ask for written confirmation of the clearances they will maintain between the hob and the splashback material
Check that any backing board or air gap requirements are included in the quote
Confirm the installer’s warranty covers both materials and workmanship
For coastal homes, specify marine-grade fixings and ask about edge-sealing to prevent moisture ingress
Coastal-home considerations
Salt air accelerates corrosion on exposed metal fixings, grout, and unsealed stone. In coastal NZ locations, specify 316 marine-grade stainless for any metal components, use epoxy grout rather than cement-based grout, and seal all stone or porous tile edges. Rinse stainless surfaces regularly to remove salt residue before it causes pitting.
Pro Tip: If your installation deviates from the standard means of compliance in AS/NZS 5601.1, your installer must produce a certified design and retain it for seven years. Ask for a copy for your own records — it is useful documentation if you sell the property.
Key regulatory fact: Under the Gas (Safety and Measurement) Regulations 2010, a gas installation that does not follow the cited parts of AS/NZS 5601 must use a certified design. There is no grey area here — if your installer cannot confirm compliance, do not proceed until they can.
Building Code clause H1 on energy efficiency is also worth noting: reflective splashback surfaces such as mirrored or light-coloured glass can contribute to the overall light and thermal performance of a small kitchen, which may be relevant in a new build or significant renovation subject to H1 compliance.
How do you pick the right splashback for your NZ kitchen?
Start with safety and durability, then match to your style. A splashback that looks good but fails behind a gas hob or corrodes within two years is a poor investment regardless of its aesthetic appeal.
Decision criteria checklist
Hob type — Gas requires heat-resistant materials and AS/NZS 5601.1 clearances; electric and induction give you more material flexibility.
Coastal exposure — Within 1 km of the coast, specify marine-grade materials and fixings.
Maintenance tolerance — Natural stone needs regular sealing; glass and porcelain need almost none.
Budget — Set a realistic installed budget, not just a material cost. Labour, templating, and certified trades add significantly to the total.
Timeline — Glass and engineered stone require fabrication lead times of 5–14 days; tiles can often be installed within a week of ordering.
Customisation — Printed or coloured glass offers the most visual flexibility; tiles offer the widest pattern range.
Resale value — Porcelain slabs and engineered stone tend to read as premium finishes to buyers; acrylic reads as a budget finish.
12 questions to ask your installer
Are you a registered builder or licensed building practitioner?
If gas work is involved, do you hold a current gasfitter registration?
Which edition of AS/NZS 5601.1 will you be working to?
Is a certified design required for my configuration, and if so, who produces it?
What clearances will you maintain between the hob and the splashback material?
Does the quote include a fire-rated backing board or air gap if required?
What substrate preparation is included (removal of existing splashback, waterproofing, levelling)?
What is the fabrication and installation lead time for this material?
What warranty do you provide on materials and workmanship, and is it in writing?
Who manages the coordination between trades if multiple are required (tiler, gasfitter, electrician)?
For coastal installations: are you specifying 316 marine-grade fixings and epoxy grout?
Can you provide references or a portfolio of completed splashback projects in NZ?
Red flags to watch for
No written warranty offered
Vague or evasive answers about gas compliance and AS/NZS 5601.1
No evidence of gasfitter registration when gas work is required
A quote that does not itemise substrate preparation or backing board costs
Pressure to proceed without a certified design when one is clearly needed
Maintenance and cleaning by material
Keeping a splashback in good condition comes down to using the right products and avoiding a handful of common mistakes.
Glass
Do: Wipe daily with a damp microfibre cloth; use a streak-free glass cleaner for grease
Do not: Use abrasive pads, steel wool, or harsh chemical cleaners that can damage the painted backing
Porcelain and large-format porcelain slab
Do: Wipe with a damp cloth; use a pH-neutral cleaner for stubborn marks
Do not: Use abrasive scrubbers; the surface is hard but the glaze can dull over time with harsh products
Ceramic tile and grout
Do: Use epoxy grout rather than cement-based grout; clean grout lines with a soft brush and a mild alkaline cleaner
Do not: Use bleach regularly on cement grout — it weakens the binder and causes crumbling over time
Natural stone
Do: Seal every 12–24 months with a penetrating stone sealer; clean with a pH-neutral product
Do not: Use vinegar, lemon juice, or any acidic cleaner — they etch the surface permanently
Stainless steel
Do: Wipe with a damp microfibre cloth in the direction of the grain; rinse coastal installations regularly to remove salt residue
Do not: Use steel wool, abrasive pads, or chlorine-based cleaners — all cause surface scratching or pitting
Acrylic
Do: Wipe with a soft damp cloth and a mild detergent
Do not: Use abrasive cleaners or place hot pans near the surface; acrylic softens and discolours with sustained heat
Industry practice recommends epoxy grout in humid or high-use kitchens to reduce staining and maintenance compared with cement-based grout. For any tiled splashback in a NZ coastal or high-humidity kitchen, epoxy grout is the practical standard, not an upgrade.
What a full-service renovator does for your splashback project
A managed renovator coordinates every trade involved in a splashback installation: templating, substrate preparation, certified gasfitter for hob disconnection and reconnection, tiler or glass installer, electrician for power point relocation, and final waterproofing sign-off. For homeowners who do not want to manage that sequence themselves, a single point of contact reduces both risk and time.
Sortedhomesolutions provides this full coordination for kitchen splashback projects in Auckland. The services directly relevant to a splashback upgrade include:
Project management from initial measure to final clean
Coordination of certified trades (gasfitter, licensed building practitioner, tiler, electrician)
Building consent management where required
Material sourcing and supplier liaison
Single written quote covering all trades and materials
Workmanship warranty on completed work
What this means in practice: You do not need to find a gasfitter, a tiler, and an electrician separately, confirm their compliance with AS/NZS 5601.1, and coordinate their schedules. Sortedhomesolutions handles that. One call, one quote, one team.
For a managed kitchen splashback project, the typical sequence with Sortedhomesolutions runs: initial consultation and measure, material selection and quote, fabrication or material order, certified trade scheduling, installation, and final inspection. Most standard splashback projects in Auckland complete within two to three weeks from sign-off, depending on material lead times.
View completed kitchen renovation projects to see installed splashback examples across a range of materials and styles.
Balancing design and durability in New Zealand kitchens
The most common mistake I see in splashback decisions is choosing a material for how it looks in a showroom rather than how it will perform in the actual kitchen. A marble splashback behind a busy family hob looks stunning on day one. By year two, without consistent sealing and careful cleaning, it etches, stains, and becomes a source of frustration rather than pride.
The practical recommendation is straightforward: if you cook frequently, have children, or live within reach of the coast, prioritise a non-porous material. Large-format porcelain gives you the visual drama of stone without any of the sealing obligation. Toughened glass gives you a seamless, light-filled surface that wipes clean in seconds. Both are available in NZ, both are well-suited to the range of conditions Kiwi homes face, and both hold their appearance over years of daily use.
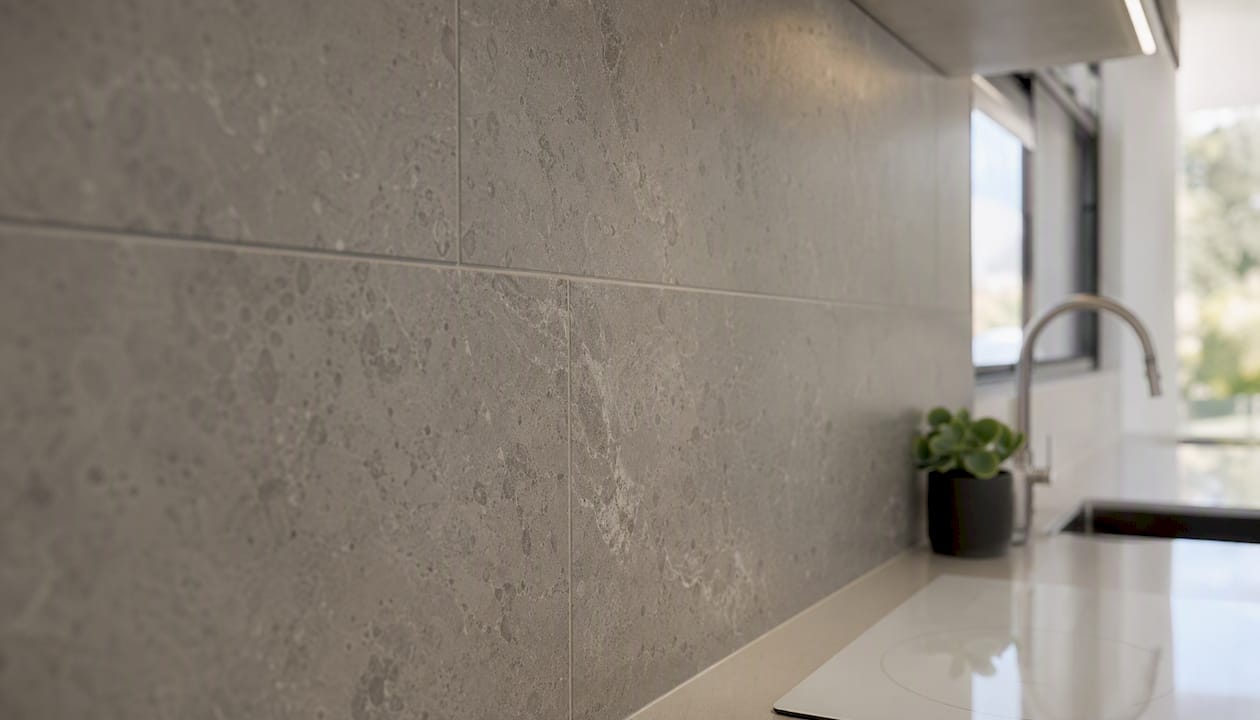
Where design matters most, use it in the details: the tile pattern, the grout colour, the print on a glass panel. Those choices cost little extra and make a real visual difference. The material itself should be chosen on durability first.
Use the 12 questions in this article when you call an installer. A good installer will answer every one of them clearly and in writing. If they cannot, that tells you something useful before any money changes hands.
Sortedhomesolutions: one team for your kitchen splashback
Choosing the right splashback material is only part of the job. Getting it installed correctly, with the right certified trades, the right gas clearances, and a written warranty, is where most homeowners run into difficulty when they try to coordinate it themselves.

Sortedhomesolutions manages the entire process for Auckland homeowners: one quote, one team, and one point of contact from measure to completion. Whether you are replacing an existing splashback or upgrading as part of a full kitchen renovation, the team coordinates gasfitters, tilers, electricians, and building consent where required. You do not need to chase trades or verify compliance separately. View the kitchen and bathroom renovation pricing to see what is included in a managed project, or browse the completed kitchen gallery to see the standard of finish. Contact Sortedhomesolutions to get a fixed quote for your splashback project.
Sources
These are the primary sources your installer should be working from. Ask them directly which standards and regulations apply to your project.
Recommended
Comments